Drawing Basic Shapes with GPUI Canvas
This series of articles shares the learnings while I’m building Beam - A native GUI HTTP client written in Rust
When I was working on Beam - A native GUI HTTP client written in Rust based on gpui, it renders an animated progress bar to indicate the request is sending. Initially, I render an animated div via with_animation(), however the progress bar spans over the response pane with square corners, it visually obsecure the pane’s rounded top corners. See
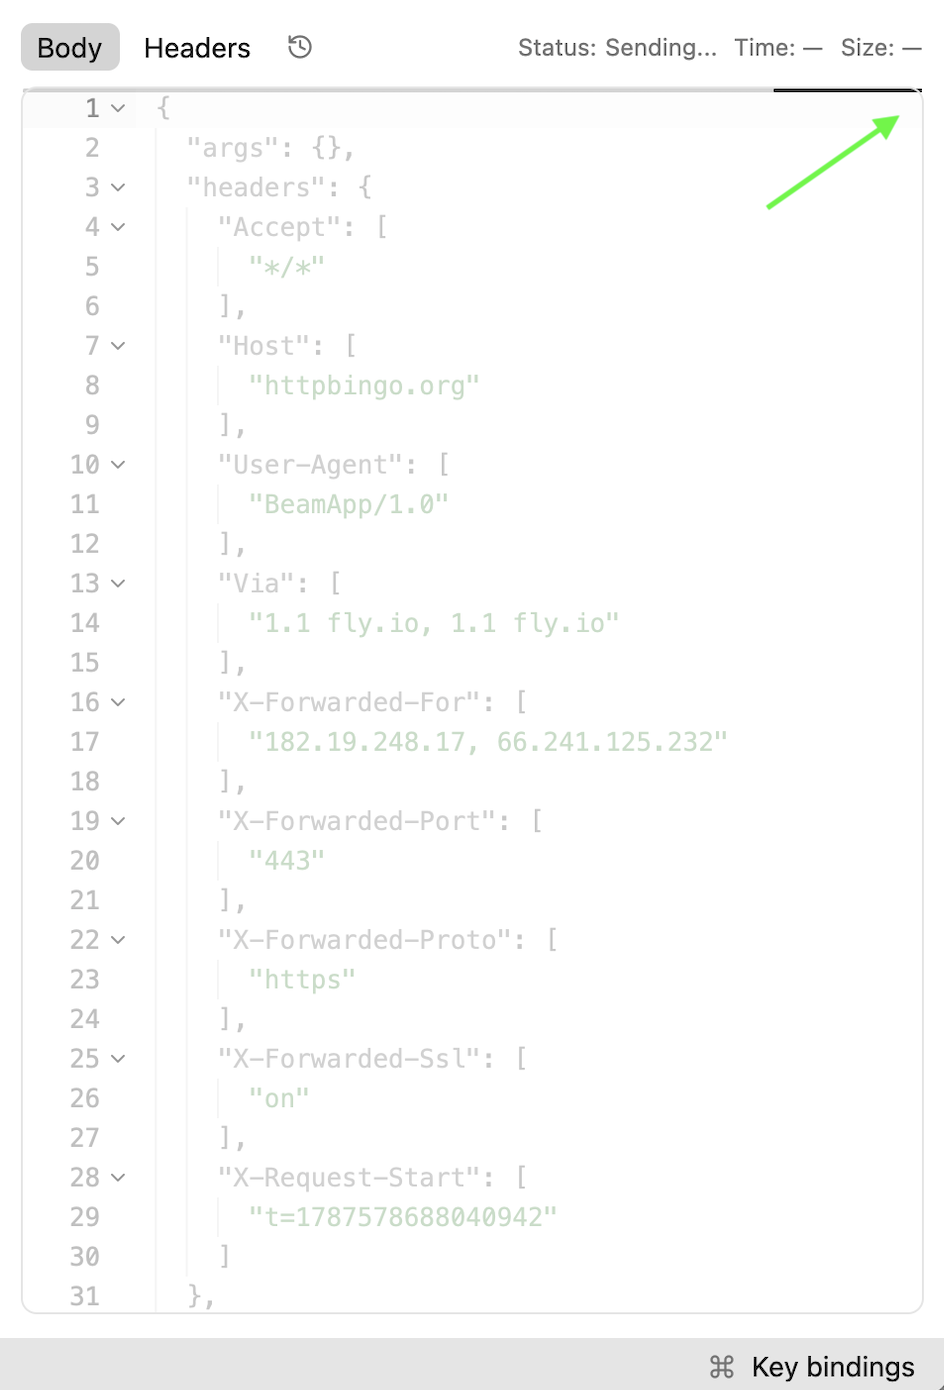
By right, the progress bar should respect the pane’s top corner radius. I tried to add rouned corners to the progress bar, or with different positioning, but the progress bar still obsecures the rouned corners. Eventually, I decided to use canvas to draw a progress bar. Here’s the version with canvas
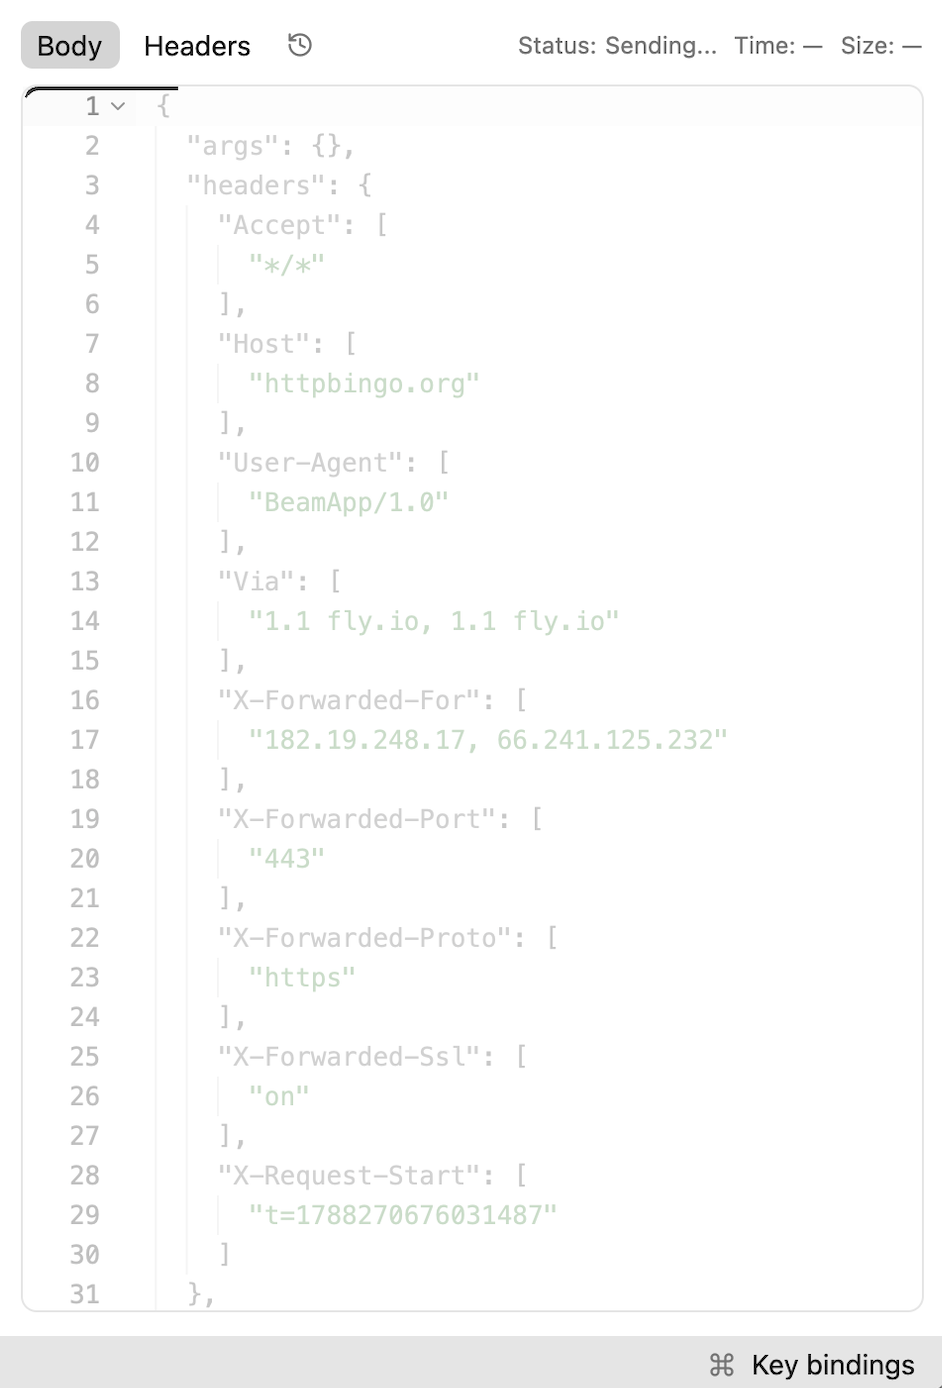
This leads to this article, in which I’ll share how to use gpui’s canvas API to draw basic shapes.
The canvas<T>() API takes in a prepaint and paint function implementations. This is exactly how gpui draw the UI.
pub fn canvas<T>(
    prepaint: impl 'static + FnOnce(Bounds<Pixels>, &mut Window, &mut App) -> T,
    paint: impl 'static + FnOnce(Bounds<Pixels>, T, &mut Window, &mut App),
) -> Canvas<T>
We’ll use paint function to draw on the canvas. First, lets understand PathBuilder, we need it to draw the shapes.
PathBuilder
PathBuilder is to build the path as its name suggests, think of it as a brush. Different styles of brushes can be created via
pub fn stroke(width: Pixels) -> Selfpub fn fill() -> Selfpub fn with_style(self, style: PathStyle) -> Selfpub fn dash_array(self, dash_array: &[Pixels]) -> Self
To move the brush, for the simplicify purpose, we’ll only use the 3 APIs:
pub fn move_to(&mut self, to: Point<Pixels>)pub fn line_to(&mut self, to: Point<Pixels>)pub fn arc_to(&mut self, radii: Point<Pixels>, x_rotation: Pixels, large_arc: bool, sweep: bool, to: Point<Pixels>)
Line
It takes 2 points to draw a line, start and end points.
// Create a PathBuilder with 5px stroke
let mut line: PathBuilder = PathBuilder::stroke(width: px(pixels: 5.));

// Move the brush to the start point
line.move_to(point(start_x, start_y));

// Draw a straightline to end point
line.line_to(point(end_x, start_y));
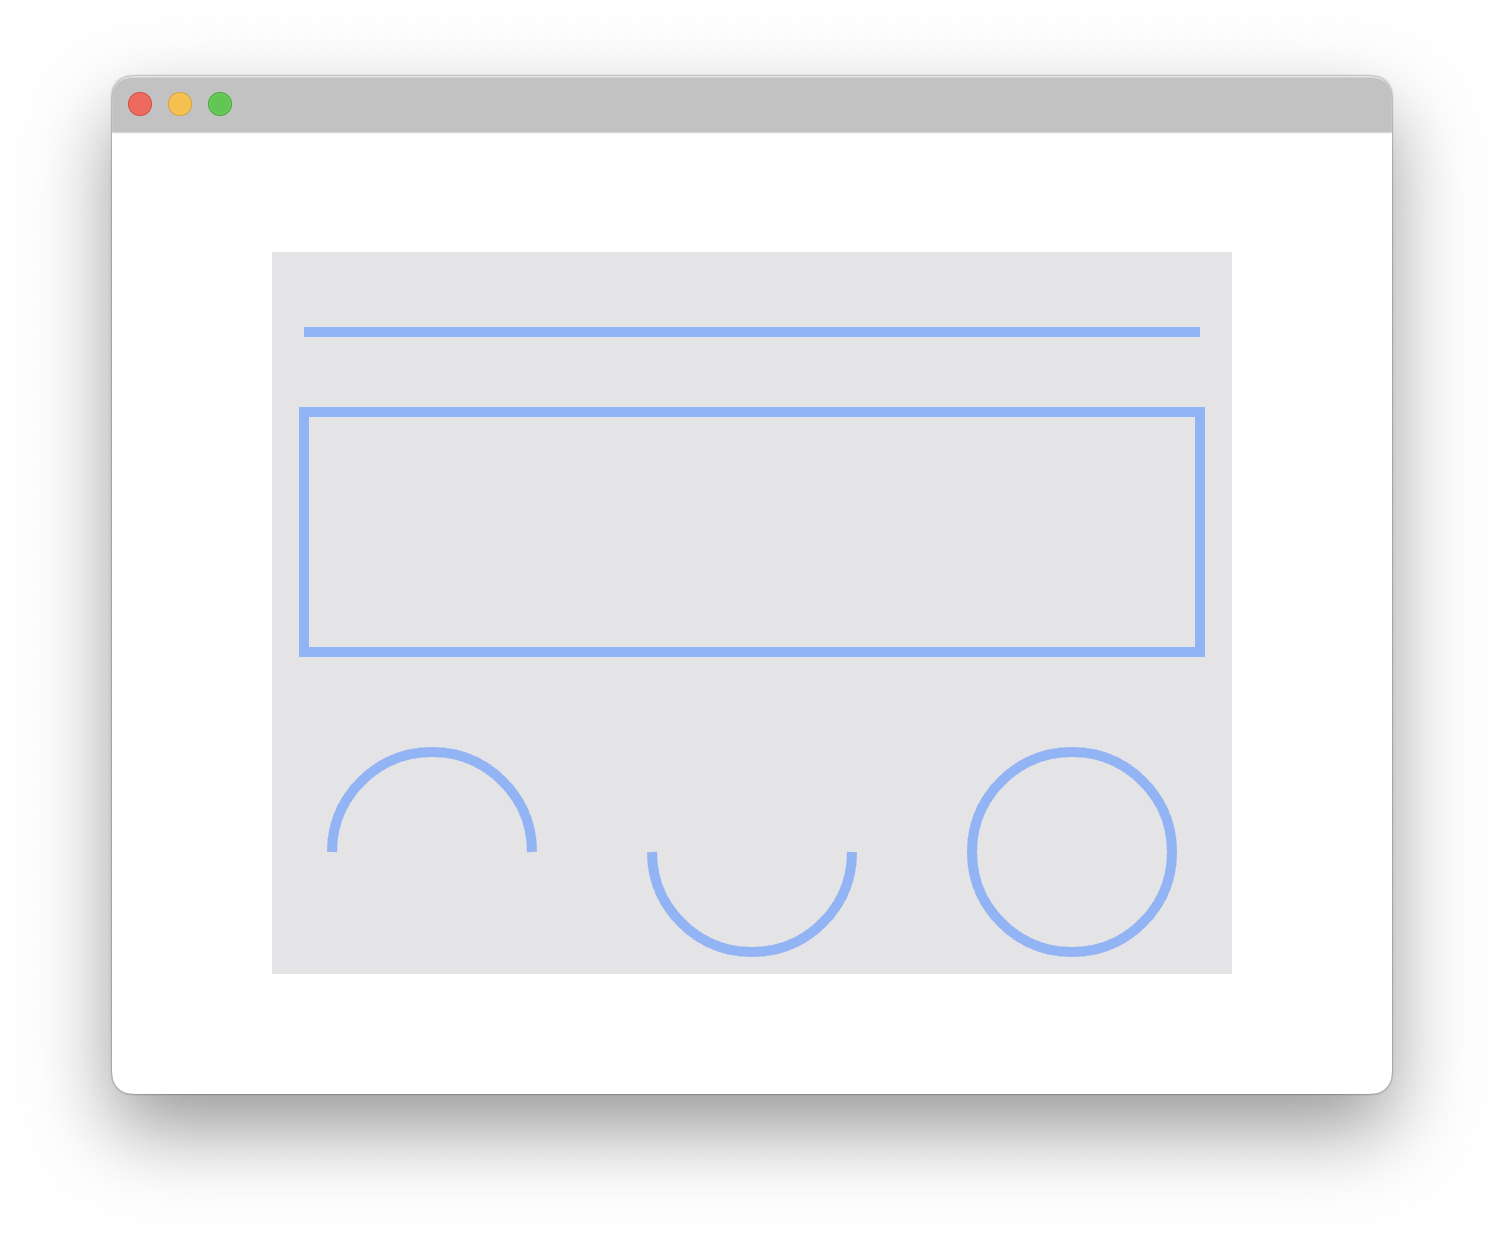
See the first shape in the Example below.
Rectangular
To draw a rectangular, we need to draw 3 lines. Why not 4 lines? For the last line, to make sure it connects with first line perfectly, use close() to join the 2 lines.
line.move_to(point(
  bounds.left() + px(16.),
  bounds.center().y + px(40.0),
));

line.line_to(point(
  bounds.right() - px(16.),
  bounds.center().y + px(40.),
));

line.line_to(point(
  bounds.right() - px(16.),
  bounds.center().y + px(60.),
));

line.line_to(point(
  bounds.left() + px(16.),
  bounds.center().y + px(60.),
));

line.close();
See the second shape in the Example below.
Circle
arc_to function
To draw a circle, we need to draw 2 semicircles to form a circle. The arc_to function has 5 parameters:
radii
it’s point(radius_x, radius_y). It describes the ellipse. For a circle, the radius_x and radius_y are equal; for an oval, they’re different.
x_rotation
It rotates the ellipse used to create the arc.
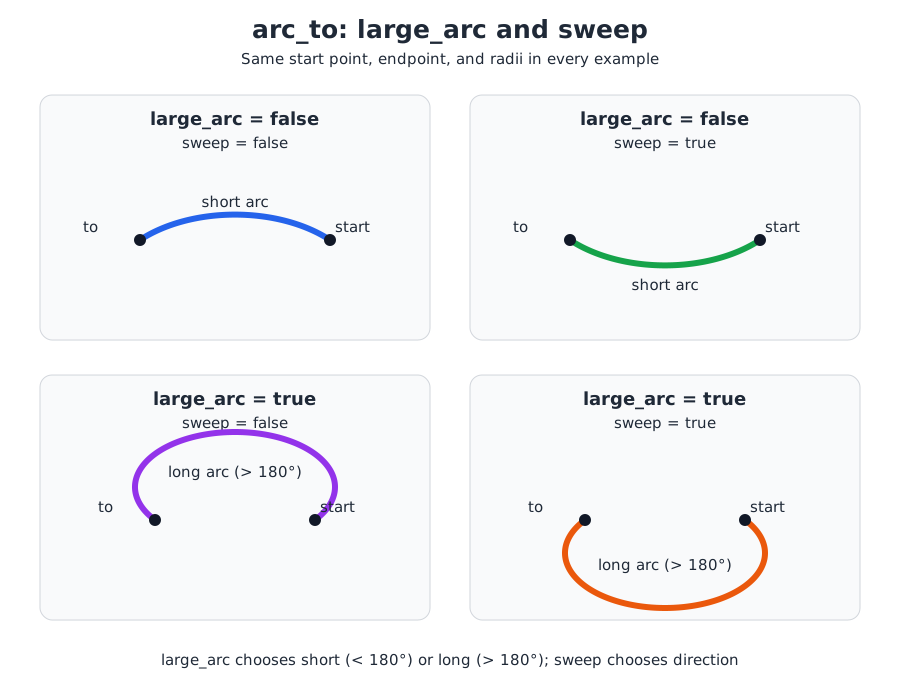
large_arc
It determines whether to draw the large arc or small one. From one point to another, you can either draw a large arc or small one. To draw a semicircle, it doesn’t matter, the 2 arcs are same length.
sweep
It determines whether to draw the arc in one direction or another. E.g. ◟ or ◝. Setting it to false goes the counter-clockwise; otherwise goes to the clockwise.
to
It’s the endpoint of the arc.
This SVG illusrate the large_arc and sweep.
This SVG illustrates start point, endpoint, and radii.
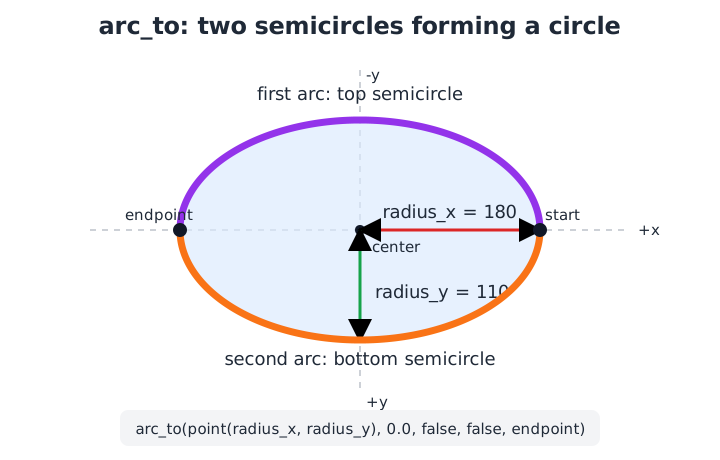
Let’s draw the first semicircle.
let center = point(bounds.center().x, bounds.center().y + px(90.));
let radius = px(20.);
let mut circle = PathBuilder::stroke(px(5.0));

circle.move_to(point(center.x + radius, center.y));

// Draw the top semicircle
circle.arc_to(
  point(radius, radius), // Circle shape
  px(0.0), // no roration of the ellipse
  false, // Render small arc
  false, // Render the arc counter-clockwise
  point(center.x - radius, center.y),
);

// Draw the bottom semicircle
circle.arc_to(
  point(radius, radius), // Circle shape
  px(0.0), // no roration of the ellipse
  false, // Render small arc
  false, // Render the arc counter-clockwise
  point(center.x + radius, center.y),
);

circle.close();

if let Ok(path) = circle.build() {
  window.paint_path(path, rgb(0x89b4fa));
}
See the third - fifth shapes in the Example below.
Example
This is an example of the shapes from the above code snippets.
What else
Now we know how to draw an arc, we can draw a spinner loading icon together with with_animation function. We just need to calculate the start point and endpoint position based on the progress from the animator parameter in with_animation.